Getting started
First of all, you can find all the Unless components, Layouts, Displays and Elements, including their source code, in our public Bit repository: https://bit.cloud/unless/component-library. Take a look at our existing components and clone them to use as your starting point.
Follow these steps to get started with the Unless Component Framework:
1. Install Bit
Install Bit using the following command:
npx @teambit/bvm install
2. Create a bit.cloud account
Sign up for a Bit.cloud account if you don't already have one.
3. Create a bit.cloud organisation
Create a new organisation within your Bit.cloud account.
4. Create a bit.cloud scope
Create a new scope within your Bit.cloud organisation.
5. Create the workspace
Create a new workspace using the Bit CLI:
bit new lit my-workspace --env teambit.web-components/lit --default-scope my-org.my-scope
Replace my-org and my-scope with your Bit.cloud organisation and scope names.
This will create a directory my-workspace, open the directory and continue from there.
In the new directory, add the following option to your tsconfig.json to enable experimental decorators:
"compilerOptions": {
    "experimentalDecorators": true,
  }
6. Install minimal dependencies
Install the required dependencies for the Unless Component Framework:
bit install \
	@unless/component-library.display.display \
	@unless/component-library.layout.layout \
	@unless/component-library.element.element \
	@unless/component-library.utils.compose \
	@unless/component-library.utils.types
7. Fork an existing component
Fork one of our existing components using the Bit CLI. For this example we are cloning a two-column inline component.
bit fork unless.component-library/component/inline/two-column
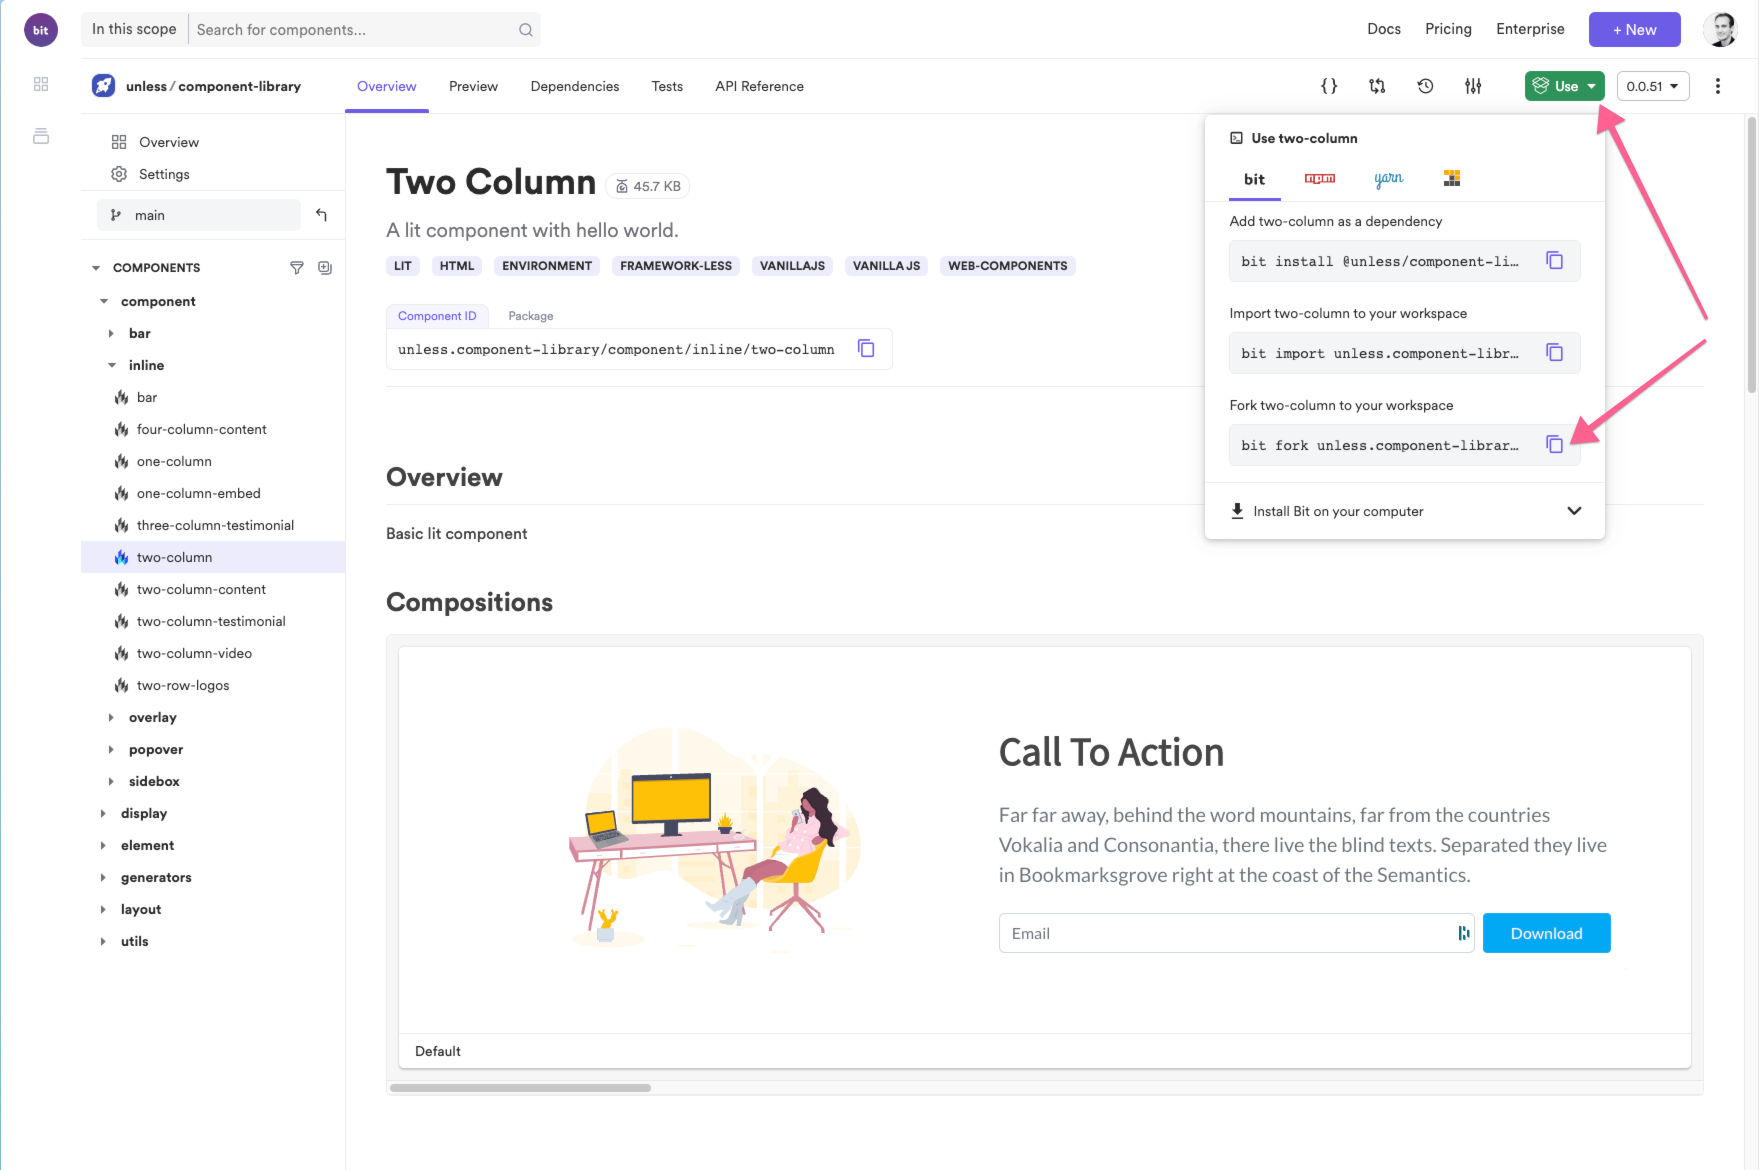
To get the fork command simply go to the component and click on the 'use' button.
8. Start
Now you can start the component UI using the Bit CLI:
bit start
This will open a new webpage on localhost:3000 where it will load the component you just created. Click on the component name and go to the preview tab, this will show you the component directly on the page. Notice the UI looks similar to our component library on bit.cloud. You can click on the component and click on the preview tab to see the actual component live rendered.

Your local workspace showing the component that was forked.
9. Fork and change a layout
Since our previous example uses a layout we created, you can't make any changes in it. To be able to create your own layout lets fork the layout from the previous example. First hit CTR+C to stop the running server, then run the following command:
bit fork unless.component-library/layout/two-column
After that, run bit start again to start the server. You'll now see the new layout appear in the development UI. If you click on it, it will also show you the package name in the tab next to "Component ID". Copy the package name and go to your code. In the code of the component you created in component/inline/two-column, replace the package from @unless/component-library.layout.two-column to your new package name we just copied.
Now you are using the layout from your local layout that is located in component/layout/two-column/two-column.ts. The developer UI will auto-update, so any changes you make here and save will immediately be reflected in the UI. From here you can start adding your own UI elements, API calls, custom logic, etc.

Showing a custom version of the forked component and layout.
By following these steps, you'll have successfully set up your workspace and installed the required dependencies to start building components with the Unless Component Framework. Refer to the documentation for more information on creating and managing components, their variants, and folder structures.
Updated over 1 year ago